EXODE - Personal making-of (english)
Par NicoJak le dimanche, août 31 2014, 19:58 - making of - Lien permanent

Here's my personal making of for EXODE, my graduation film, translated in english.
> French version
Warning, SPOILERS ALERT !
Pre-production / Direction :
After my project had been selected for the graduation films (you can see the very first drawings by clicking here, here and there), I took part in the art direction.


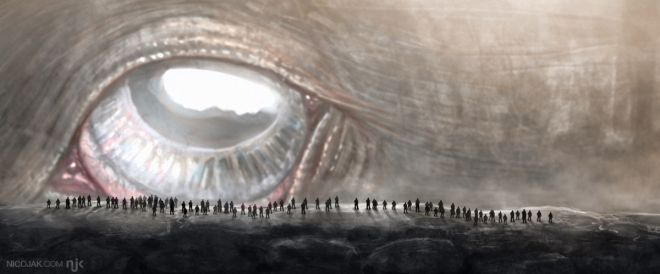
The actual size of the dinosaur was one of the things that changed the most during the early stages of pre-production. At first, there were houses visibles on its back, then, as we went along, the inhabitants became invisible at its scale, like parasites.

concept arts :
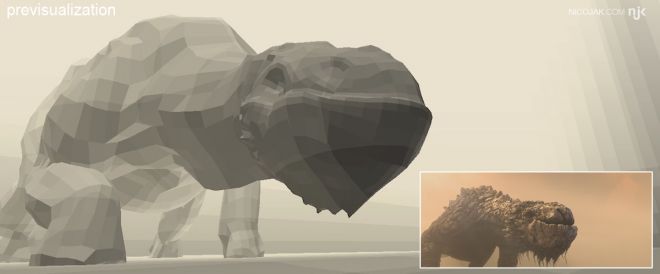
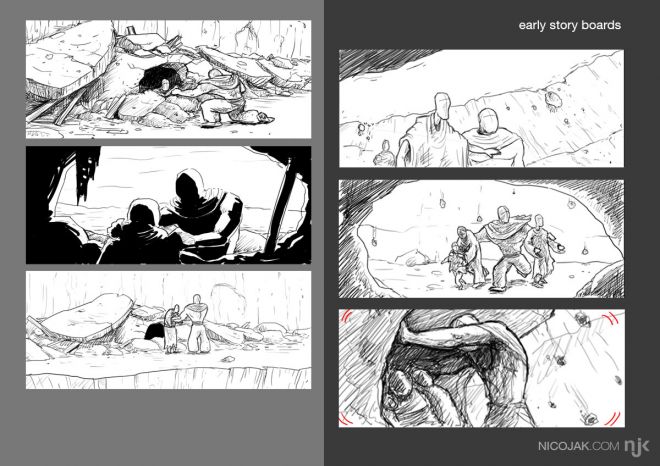
Then I took part in the direction process. With Thomas and Kathleen, we worked on several versions of the story board, And the whole team worked on a CG previsualization. The previz helped us a lot on the dinosaur shots. We were able to find the rythme and the camera movements of this sequence. On the other hand, classic 2D story board was more useful for the character-driven scenes.


The Village :
The villages between the scales of the dinosaur is where the human-like people live. It changed a lot during the conception. Now there's no clearly visible houses or constructions that we had on the first concepts. Since the action takes place after the disaster, the rock houses are now stacks of debris.
After drawing a before/after sketch of the village (above), I made a rough modeling in 3Ds Max. It was used to set up the location and find the shots in the previz. This mesh was also a basis for me to sculpt the village in ZBrush. Thanks to the Dynamesh option, I was able to sculpt without topology constraints, and the ZRemesher tool saved us a lot of time with the retopology.


Eventhough the village is supposed to be made from one piece, I had to divide it in several "scales" for avoiding heavy meshes. It also allowed me to keep a certain flexibility in terms of layout and scene assembling.
I sculpted the main scales in detail and I made an "average" scale, sculpted at 360°, for using it several times on the background of the shots.
In addition of the displacement maps, ZBrush was used to generate several maps usable in the texturing process (cavity, ambient occlusion, peaks and valleys, roughness...). Those maps were then used as masks in MARI to paint the scales.

 first render / comp tests using only the cavity map as a diffuse texture.
It was my first experience with the shading and lighting on Maya / Arnold. Since we had extreme close ups of the village during the shots closes to the characters, I had to add a procedural noise to the displacement shader, that we could adjust depending on the shots. The auto bump and dicing cam features from Arnold allowed us to keep a important level of detail without having too heavy meshes. All the volumetric effects (atmospheric perspective, dust...) from this sequence were added in comp.
 final sculpt only / final textured render with basic compositing.
The Characters :
The character design was the source of many questions. We quickly had the idea of simplified characters, with no visible eyes or mouth. The human people had to match their environment, as they were litteraly a part of it. That's where the rocky aspect came from. Our references were sculptors like Giacometti, the characters had to be like silhouets, especially for the exodus sequence. The main characters had to be instantanely recognizable archetypes : the strong man, the old man, the mother and her child.
However, once the character design was found on the paper, especially thanks to Thomas's sketches, we had difficulties to adapt it in 3D. The 2D concepts worked essentially because of the shadows made by the characters faces. In 3D, the creased and empty orbits gave a creepy and lifeless look to them. We decided, during the production, to remake the head design from scratch, directly in digital sculpting, using ZBrush. We decided to go with a more hard edged look, which reacts better to the lighting and reminds a rough rock sculpture. It was in opposition to the first models, which were "softer", more like clay.As for me, I made the first sculpt of the old man, before the head re-design. Then, I dealt with the head re-design of the strong man, following the style of the other characters re-designed by Thomas. The strong man is the only shirtless character, so I had to modify the body as well, to harden the edges and get this angular look.

After the human characters were approved, I took charge of the texturing and shading of them : the four main characters and a "average" one, used for the crowd an the backgrounds. Like with the village, I used cavity maps from ZBrush as painting masks in MARI. I also highlighted the egdes with a lighter color to give the rock a worn out look. For the clothes, I painted an opacity map, to get those irregular and teared edges. I painted two bump maps too, on for the canevas texture, and another one for the borders. This last map, used in the displacement shader, gave a thickness and a worn aspect to the edges of the clothes.
> click here to see the other turntables
Lighting / Compositing :
I was in charge of scene assembly, lighting and compositing on 3 sequences. The two sequences on the village (before and after the destruction) and the last sequence of the fillm. For the first village sequence, the lighting was not so difficult since it was daylight, with direct light from the sun. On the other hand, the next sequence was more complex to deal with. It needed to be dark, misty with an almost underwater look. All the volumetric effects were added in comp. I also integrated a lot of stock-shots, especially for the destruction scene.
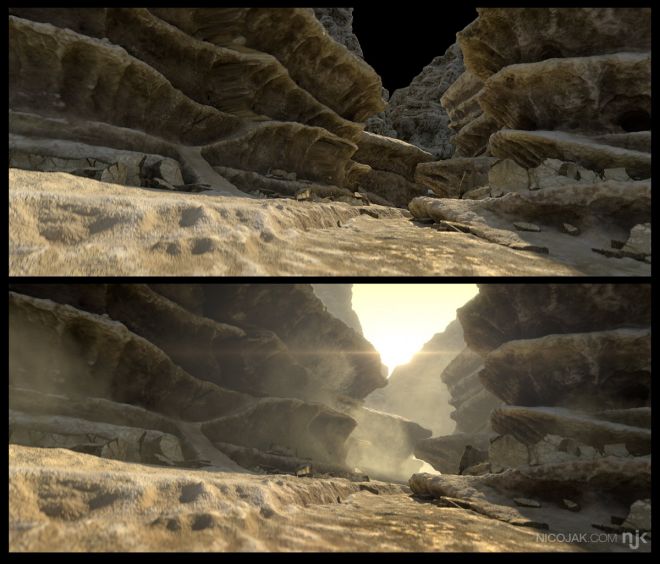
In the last sequence, the mountain set was made by Sandrine, using VUE. We wanted to add and intergrate the characters over it, like in the exodus part. However, we realized that would bring a lot of integration issues. I kept the VUE render for the sandstorm scene which was made combinig noises form Nuke and several stock shot layers. For the next shots, I took the low def VUE meshes we used in layout. After a quick retopology, I made a procedural shader with several fractal noises, using the VUE renders as a reference. This method saved me a lot of time on this sequence at the end of the production. The skies were added in comp, using Nuke's 3D tools and FBX cam exports from Maya for the moving shots.
For more images and infomations, visit exode-movie, our website / production blog.
See you in one year for the online release !


